
EBS Lesson Seven Developing rock grooves (part 2)
EBS Lesson Seven Developing rock grooves (part 2)
In Lesson 6 you learned to play an octave shape using a low G and a higher G. It is now time to transfer this shape to other notes.
Figure 1, below, shows the octave shape for A on the musical stave.
Figure 1. The octave shape for A (Enlarge)

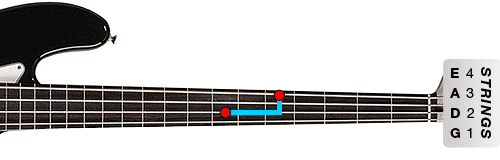
Figure 2, below, shows the octave shape on the fingerboard. Follow these instructions to create your octave shape for A.
Place your first (index) finger of your left hand on the fifth fret of the E string to create your low A bass note. Then place your fourth finger on the D string at the seventh fret to create your higher A.
Figure 2. The octave shape for A
Watch, listen and play along with our first exercise which uses the octave shape of A, as described.



|
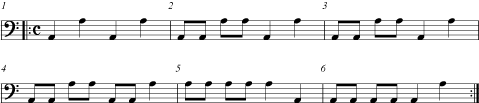
It is possible to create many different patterns using this octave shape and this fingering. Play the following exercise, which is a very musical example of the octave shape being used in a bass line.
|
|
Next: Practice
